
A Chordle group gives your band, choir or church team one shared library, named after your group, on every member’s devices. You pay for the seats and every member gets unlimited songs, with nothing to buy themselves.
Start a group
- Choose Start a free group trial on the pricing page and sign in with Google or Microsoft. This creates your Chordle account if you don’t have one.
- Give the group a name. This is what members see in the app, so use the name they know, such as “St. Luke’s”.
- Choose how many seats you need. Everyone takes a seat, you included. The price shown is what you’ll pay when the trial ends, and you can change seats any time.
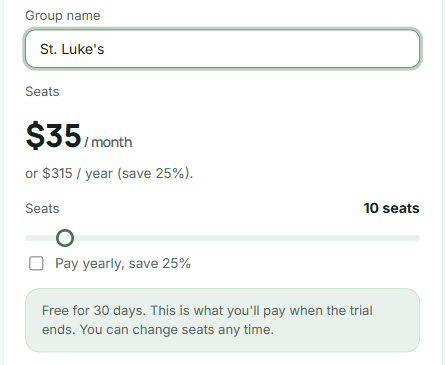
The group is free for 30 days, with no card needed. Its page shows a short checklist to get you going.
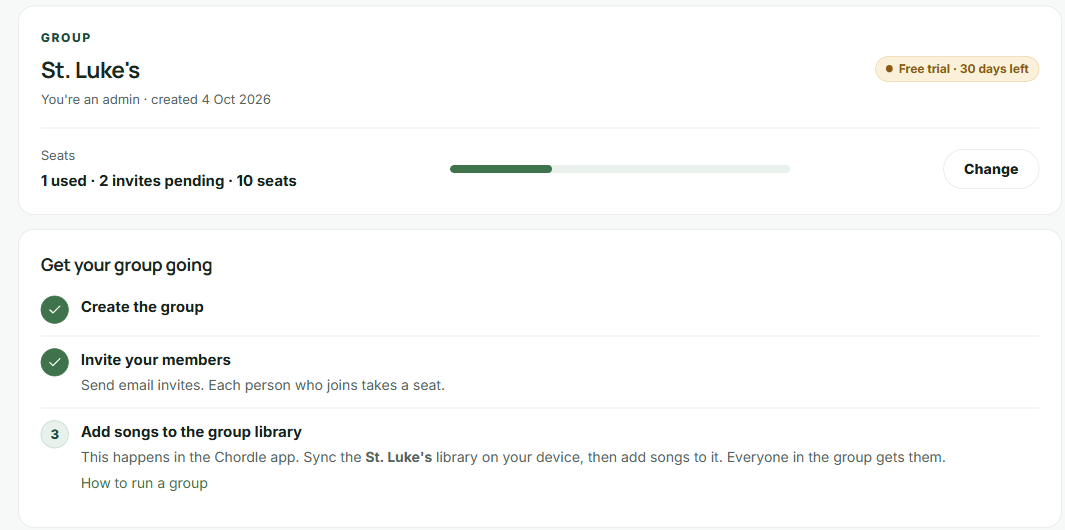
Invite members
Open Members on the group’s page.
By email: enter one or more email addresses, choose a role, and choose Send invites. Each person gets an email with a link that works for 14 days. People can accept with any Google or Microsoft account; it doesn’t have to match the email you sent it to.
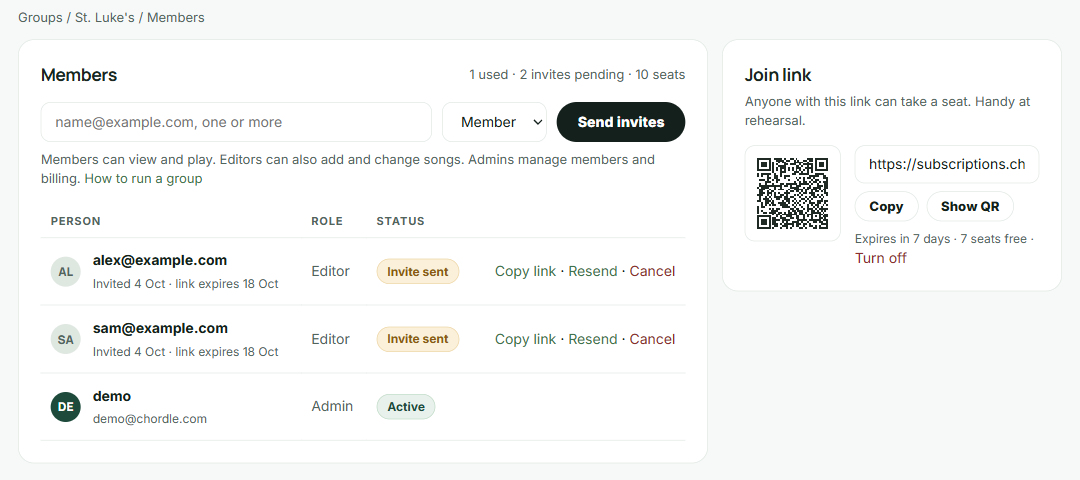
Pending invites are listed with their expiry date. From there you can Copy link to send it yourself (for example in a WhatsApp group), Resend the email, or Cancel the invite to free its seat.
With a join link: for rehearsals, choose how long the link should work (1, 7 or 30 days) and Create join link. Anyone with the link, or who scans its QR code, can take a free seat. Show the QR code on screen, then choose Turn off when everyone’s in. People who already joined keep their seats.
Choose roles
- Members can view and play the group’s songs and set lists.
- Editors can also add and change songs.
- Admins also manage members, invites and billing.
Change someone’s role from the list on Members. Making someone an admin asks you to confirm first, because admins can manage billing and remove people. Having a second admin is a good idea, so someone else can sort out billing if you’re away.
To remove someone, choose Remove next to their name. Their seat is freed straight away and they stop getting the group’s songs. Copies already on their devices stay there as their own, and their personal library isn’t touched.
Build the group library
Songs and set lists are added in the Chordle app, not on the website:
- Sign the app in with the account you created the group with. Tapping Open Chordle on the group’s page does this for you.
- When Chordle asks which libraries to sync, tap Sync next to your group’s name. You can also add it later from the sync panel’s Set up syncing menu.
- Add songs to the group library, as below. Everyone in the group gets them on their next sync.
Editors and admins can add to the library. Members can play the group’s songs but not change them.
Add songs you already have
Select one or more songs in the song library, then choose Group > Add to your group in the toolbar.
Chordle asks you to confirm, because everyone in the group will see the songs and any changes you make. From then on they sync through the group rather than your own Chordle Drive or cloud storage.
Songs in a group are marked with the group’s name in the library. To see only the group’s songs, choose Results from all sources in the search filters menu and pick the group (see join a group).
Set lists work the same way, from the Group menu in the set list library.
Create new songs and set lists for the group
- When you save a new song, the Save button’s menu offers Save to your group, so it goes straight into the group library.
- New set list for your group starts a set list in the group library.
If most of what you create on a device is for the group, open the sync panel and tick the group under Add new songs and set lists to groups automatically. New songs and set lists you create or import on that device then go into the group without you choosing each time.

Editing the group’s songs
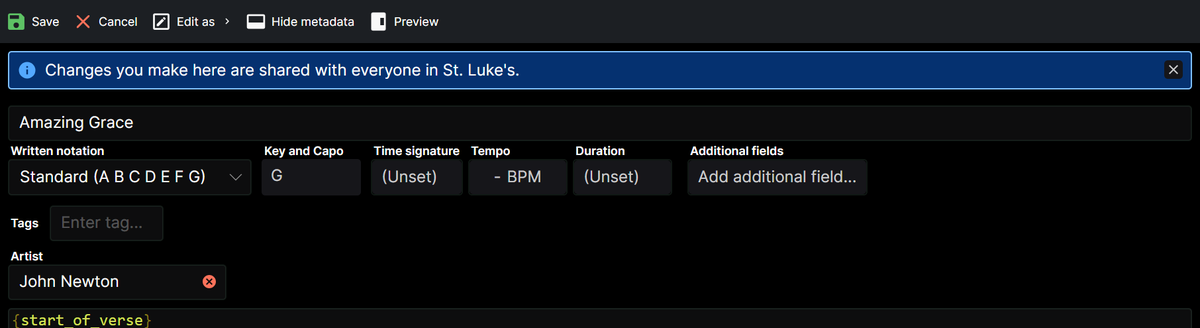
When you edit a song that’s in the group, a banner reminds you that your changes are shared with everyone in it. Close it with × once you’re used to it; it stays closed on that device.
Set up billing
Before the trial ends, open Billing & seats on the group’s page and choose Set up billing, monthly or Set up billing, annual. You’re billed for the number of seats you’ve chosen.
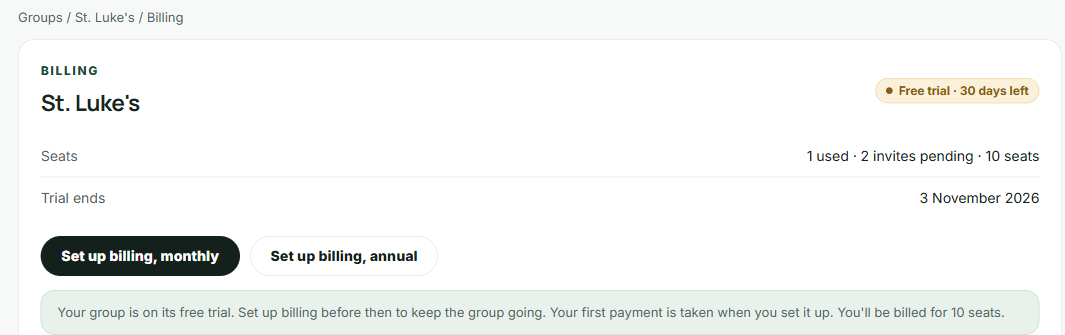 When you come back from paying, the group’s page shows when the next payment is due.
Any admin can manage billing. Manage billing opens the payment provider’s secure portal to update the card, download receipts or cancel. Changing the number of seats updates the plan straight away, and the difference is worked out for the rest of the billing period.
See the FAQ for cancelling, refunds and what happens if a payment fails.
Delete a group
Created a group by mistake, or finished with one? Any admin can delete it from the bottom of Billing & seats: type delete and choose Delete group. Everyone is removed, the group’s songs and set lists leave every member’s devices, and a subscription is cancelled first. This can’t be undone.